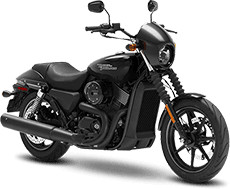
How to Do an Oil Change on a Harley Davidson
You found a nice Harley Fatboy for sale
and have taken it home. 6 months have now gone by, and you are ready to
change your oil for the first time. Below, we are going to cover the
most basic steps involved in doing a full oil change on your Harley
Davidson. For starters, make sure that you have a new filter and the
necessary oil ready.
1. First Warm Up the Engine
Before you can check the oil on your motorcycle, you will need to take it for a spin. To do this, take your bike out for a short mile ride. This should be enough to get the engine warmed up and ready to change the oil.
2. Check the Oil Levels
It is good practice to first make sure that you need to change the oil. Your oil cap should have a dipstick that comes out when removed. Using the dipstick, you can then see if your oil levels are too low. If they are, you are ready to move on.
3. Remove the Filter & Drain the Oil
Whether you bought Harley Davidson Street Bob for sale or another Harley model, changing the oil is almost always the same. Simply take out the filter and loosen the mechanism that is holding your oil in. This part can take a while so be patient.
4. Replace the Filter & Fill Up with New Oil
Once the oil is finally out, you now just need to re-attach the bolt, put the new filter on, and then top off with new oil. Be sure to only add the proper amount of oil. Adding too much oil can hurt your vehicle’s engine.
5. Warm Up the Engine Again & Check the Oil Levels
As a final precaution, make sure that the oil levels are actually as they should be. To do this, you simply need to do what we did in the first step. Take your motorcycle for a spin for about a mile or so. Then, confirm that the oil levels are as they should be.
Thinking of Buying a New Motorcycle?
Whether you need some help getting your oil changed or you want to find a Harley Road Glide for sale, come stop by Hot Metal Harley Davidson. We have a service center that includes maintenance packages such as oil changes with the purchase of certain bikes.


Comments
Post a Comment